Say Goodbye to Rough Skin With This Easy DIY Scrub
If you’ve been struggling with rough skin, a DIY scrub might be just what you need. It’s not only cost-effective, but you can also tailor the ingredients to fit your skin’s unique needs. Imagine combining natural elements to create a gentle yet effective exfoliant. Want to know how to make this transformative scrub? Let’s break down the essential ingredients and steps to get you on your way to smoother skin.
Key Takeaways
- Create a DIY scrub using sugar or sea salt as the exfoliant for effective removal of rough skin.
- Combine the exfoliant with nourishing oils like coconut or olive oil for hydration.
- Add honey and essential oils for added moisture and therapeutic benefits.
- Apply the scrub weekly using circular motions on damp skin for optimal results.
- Follow up with a moisturizer after rinsing to maintain smooth, hydrated skin.
Benefits of Using a DIY Scrub
When you choose to use a DIY scrub, you not only save money but also gain control over the ingredients that touch your skin. You’re empowered to customize homemade scrubs to target your specific concerns, ensuring they perfectly align with your skin’s needs.
By selecting quality ingredients, you can enhance the effectiveness of your scrub, promoting healthier, smoother skin. Plus, creating your own scrub is a rewarding and creative process, allowing you to experiment with various textures and scents.
You’ll also avoid harmful chemicals often found in commercial products, making your skincare routine safer and more sustainable. Ultimately, the benefits of using a DIY scrub extend beyond cost savings, fostering a deeper connection to your self-care rituals.
Essential Ingredients for Your Scrub
Creating an effective DIY scrub starts with selecting the right ingredients that nourish and exfoliate your skin.
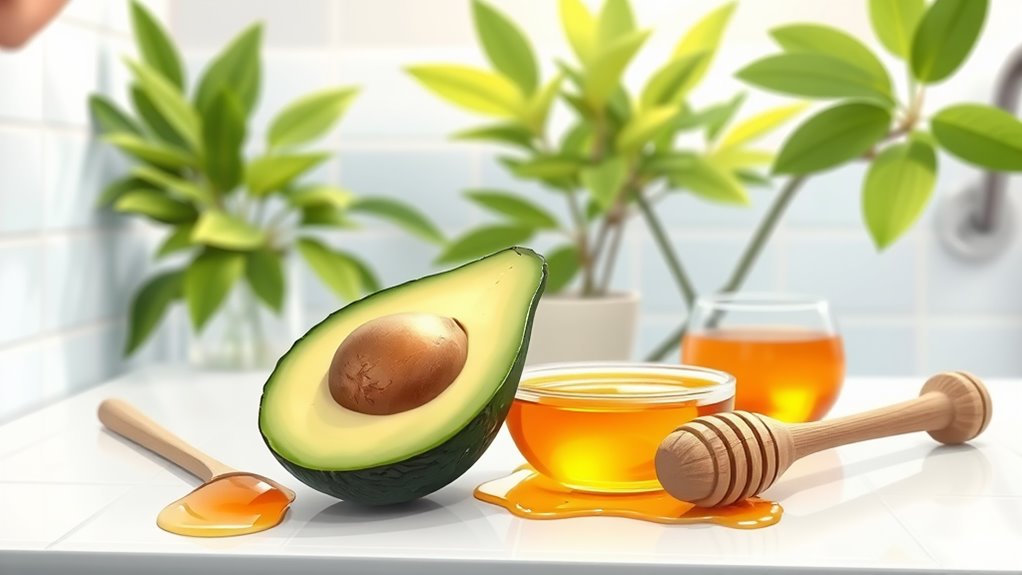
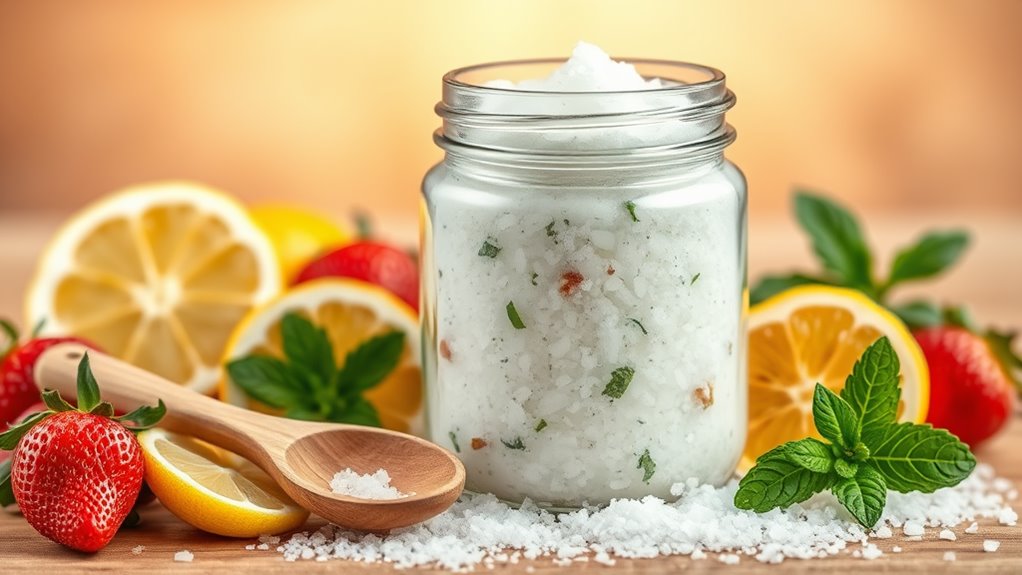
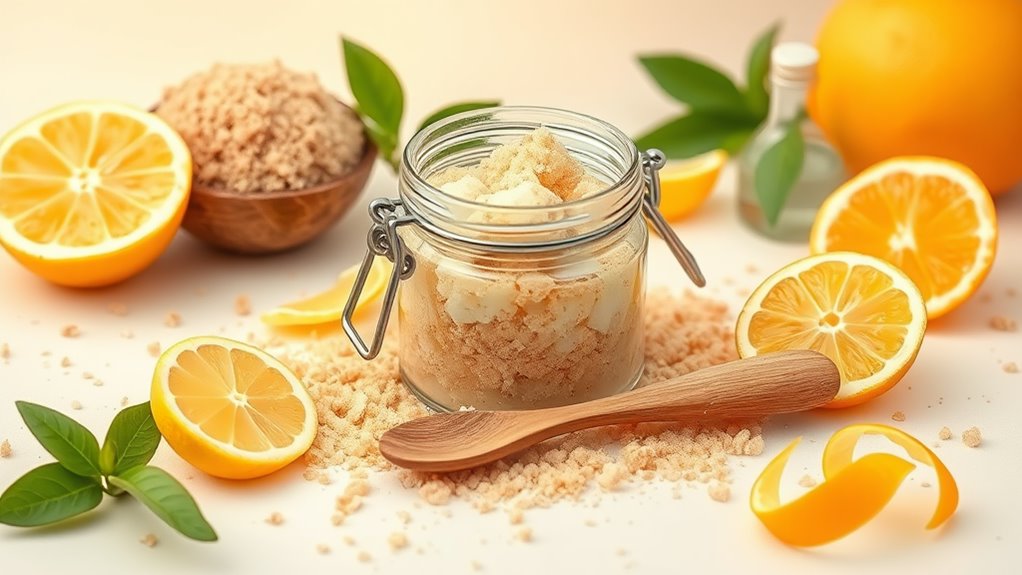
Begin with a gritty base like sugar or sea salt, which gently sloughs away dead skin cells. Next, incorporate a natural oil, such as coconut or olive oil, to hydrate and soften your skin post-exfoliation.
You can also include honey for its antibacterial properties and moisturizing benefits. Essential oils, like lavender or tea tree, not only provide a delightful scent but also enhance your scrub’s therapeutic effects.
Finally, consider adding a splash of citrus juice for an invigorating boost.
With these essential ingredients, you’ll craft a scrub that not only exfoliates but also rejuvenates, leaving your skin feeling smooth and refreshed.
Step-by-Step Instructions
Now that you’ve gathered your ingredients, it’s time to put them together to make your scrub.
Start by measuring out one cup of your exfoliant, like sugar or sea salt, and place it in a mixing bowl.
Next, add half a cup of a nourishing oil, such as coconut or olive oil, to the bowl. This will hydrate your skin while you scrub.
If you’re using essential oils, now’s the moment to add 10-15 drops for fragrance and added benefits.
Mix everything thoroughly until you achieve a consistent texture.
Once combined, transfer your scrub into an airtight container.
Label it with the date, and you’re ready to enjoy your homemade scrub whenever you need it. Incorporating effective ingredients in your scrub can further enhance its ability to improve skin texture.
Master this technique, and your skin will thank you!
Tips for Application and Frequency
To get the most out of your homemade scrub, it’s essential to apply it correctly and establish a routine that suits your skin type.
Start by using the scrub once a week, adjusting frequency based on your skin’s sensitivity. Gently massage the scrub onto damp skin in circular motions, focusing on rough areas like elbows and knees. Don’t apply too much pressure; let the natural exfoliants do the work.
Rinse thoroughly with warm water to remove all residue, and always follow up with a moisturizer to lock in hydration. If you notice any irritation, scale back to bi-weekly applications.
Consistency is key; stick to your routine, and your skin will thank you with a smoother, softer texture.
Post-Scrub Care for Smooth Skin
After you’ve exfoliated with your scrub, it’s essential to treat your skin with care to maintain that smoothness.
Start by rinsing off any remaining scrub with lukewarm water, which helps close your pores without stripping moisture.
Pat your skin dry gently with a soft towel—don’t rub!
Next, apply a high-quality moisturizer or nourishing oil to lock in hydration. Look for ingredients like hyaluronic acid or shea butter for best results.
For daytime, consider a sunscreen to protect your newly revealed skin from UV damage.
Avoid harsh soaps and heavy fragrances for at least 24 hours post-scrub to prevent irritation.
Additionally, keeping your skin hydrated is crucial because moisture retention can significantly slow down the aging process.
With these steps, you’ll not only enjoy your smooth skin but keep it looking radiant for longer.
Frequently Asked Questions
Can I Use This Scrub on My Face?
You can use this scrub on your face, but be cautious. Your facial skin’s more delicate, so consider testing a small area first. Adjust the ingredients if needed to guarantee it’s gentle enough for your skin type.
How Long Does the Scrub Last When Stored?
When stored properly in an airtight container, the scrub lasts about two to four weeks. Always check for changes in texture or smell before use, and discard if you notice any signs of spoilage.
Is This Scrub Suitable for Sensitive Skin?
Yes, this scrub can be suitable for sensitive skin if you adjust the ingredients. Test a small patch first, and consider using gentler exfoliants to avoid irritation while still achieving smoother skin.
Can I Add Essential Oils to the Scrub?
Absolutely, you can add essential oils to the scrub! Just make certain you choose oils that suit your skin type. Start with a few drops, mix well, and adjust based on your personal preference and sensitivity.
What Should I Do if I Experience Irritation?
If you experience irritation, stop using the scrub immediately. Rinse your skin with cool water, and consider applying a soothing aloe vera gel. Monitor your skin’s reaction, and consult a dermatologist if irritation persists.
Conclusion
Incorporating a DIY scrub into your skincare routine is a simple yet effective way to say goodbye to rough skin. By customizing your ingredients, you not only cater to your skin’s unique needs but also embrace a natural, chemical-free approach. Remember to use it weekly for the best results, and don’t forget to follow up with nourishing post-scrub care. Enjoy your smooth, radiant skin and the satisfaction of a personalized self-care ritual!